
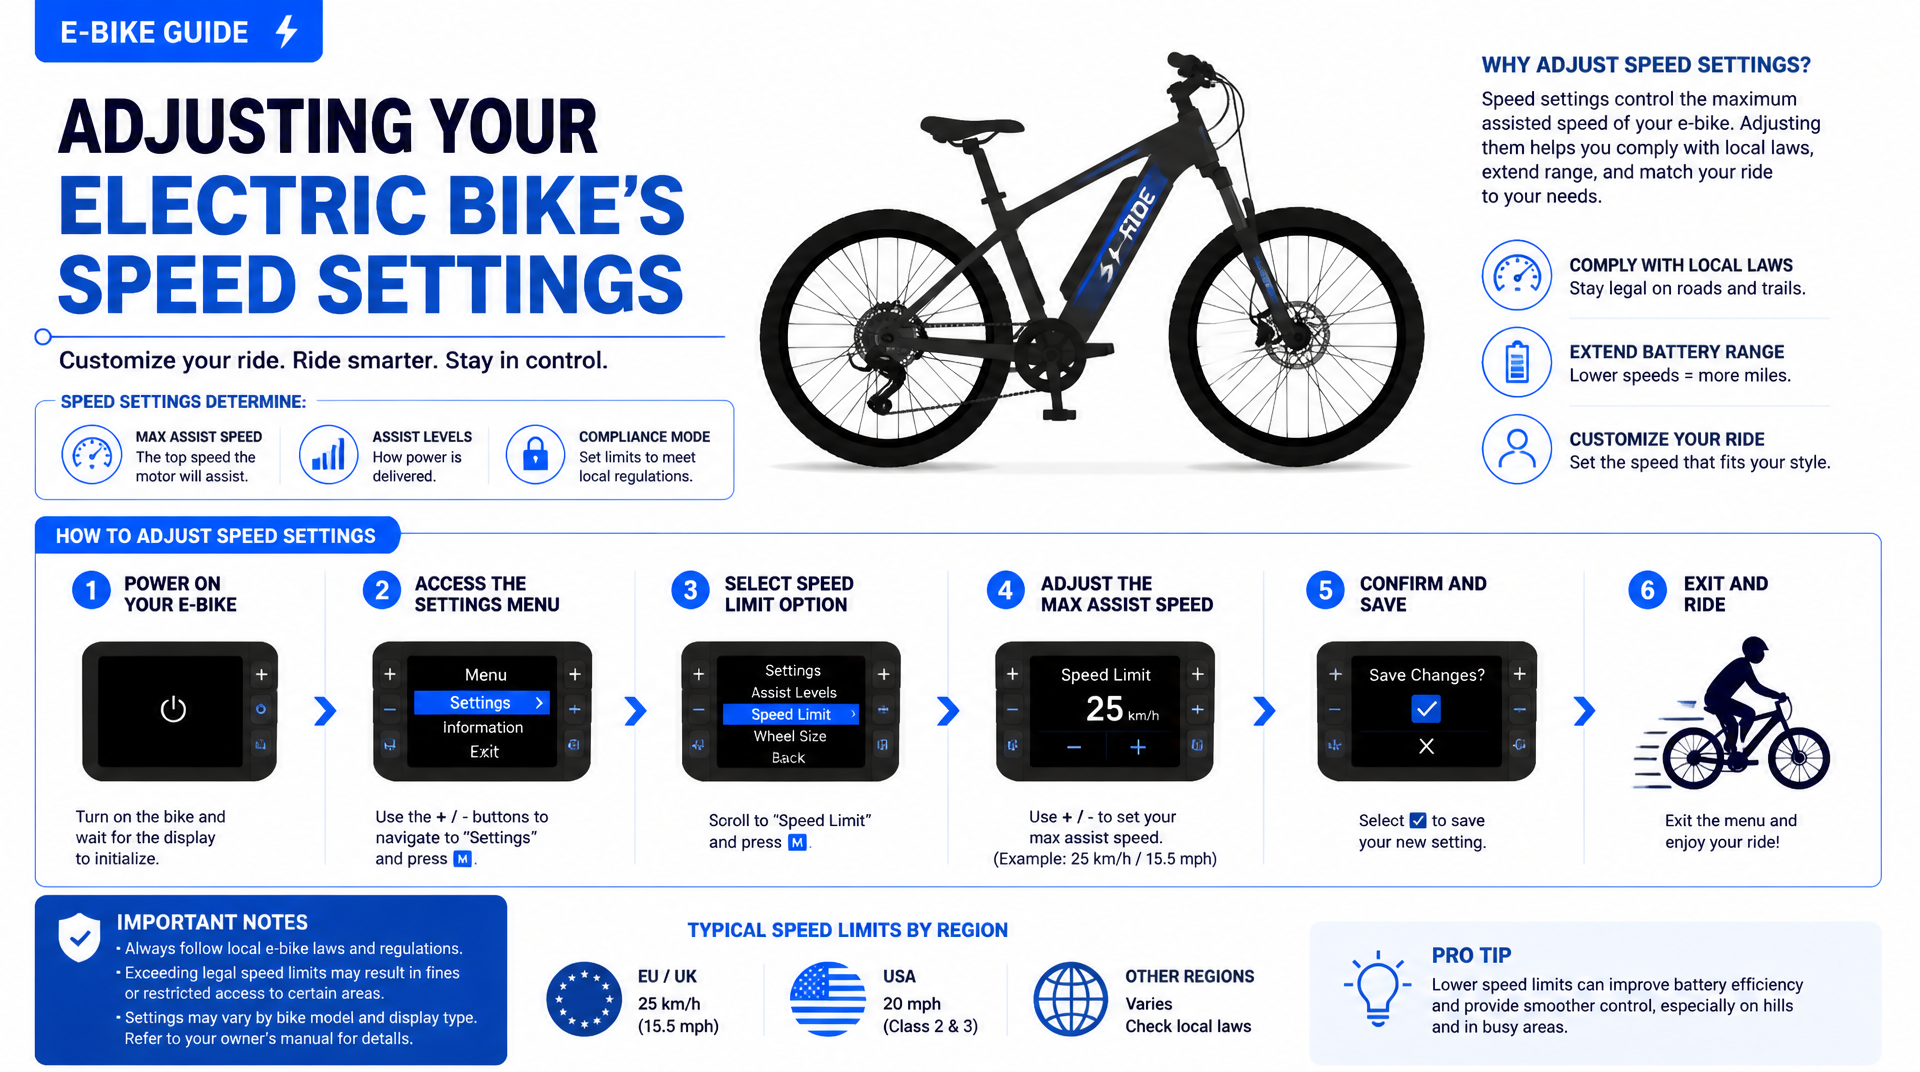
Adjusting Your Electric Bike’s Speed Settings
typically means raising or lowering the maximum pedal-assist speed or throttle limit. You can do this through the bike’s display menu, a smartphone app, or by reprogramming the motor controller. Before you make any changes, understand that speed limits are tied to legal ebike classes (Class 1, 2, or 3) and that modifying them can affect your bike’s warranty, safety, and street-legal status. If you only want more range for a long commute, lowering the speed limit is straightforward and low-risk. If you want to go faster than the factory setting, expect trade-offs in component wear and legal compliance.
Why Change Your Speed Setting?
Riders adjust speed settings for a few practical reasons:
- Extend range – Lowering the assist speed reduces battery draw. Dropping from 28 mph to 20 mph can add 15–25 percent more miles per charge, depending on terrain.
- Comply with local laws – Some trails or jurisdictions cap ebikes at 20 mph (Class 2). If your bike came set higher, bringing it down keeps you legal on multi-use paths.
- Get more power on hills – Some controllers let you raise the speed limit, but on steep grades the real limiter is often torque, not top speed. Raising the speed limit won’t help if the motor overheats before reaching that speed.
- Unlock a higher limit – A few bikes ship in a “Eu” mode (lower speed) for export. If you bought a gray-market bike, you may need to change the region setting in the display or app.
What this means for your next choice: If you frequently run out of battery before reaching your destination, lowering the speed limit is a free range extension. If you find yourself needing more speed on roads, consider whether your bike’s brakes and tires are rated for that extra pace—upgrading those components may cost as much as buying a faster bike from the factory.
Adjusting Through the Display Menu
Most current ebikes have a handlebar-mounted LCD or LED display that lets you change speed parameters. The exact menu names vary, but the general process follows these steps:
1. Turn the bike on and wait for the display to boot.
2. Enter the settings menu – usually by holding the “M” (mode) or “Up/Down” button for a few seconds.
3. Find the speed-related parameter – common labels include:
- `P01` or `P08` – wheel diameter (changing this tricks the controller into allowing a higher top speed)
- `Speed Limit` or `Max Speed`
- `Class Select` – if your bike supports switching between Class 1, 2, or 3
4. Adjust the value – For wheel-diameter tweaks, entering a smaller size (e.g., setting 26″ as 24″) makes the controller think the bike is going slower than it actually is, pushing the assist cutoff higher. For a direct speed limit, raise or lower the number (usually in km/h or mph).
5. Save and exit – Press “M” or hold the button to confirm. Test ride in a safe area and verify the change with a GPS speedometer app or a roadside speed sign.
Display Type Exceptions
- Basic monochrome LCDs (e.g., KT-LCD3, King-Meter) – use P-parameters. Check your manual for the correct P number; common ones are P01 (wheel size) and P08 (speed limit).
- Color touchscreens (e.g., Bosch Kiox, Shimano SC-EM800) – often have a dedicated “Speed Limit” slider under bike settings. Some also show a legal-class indicator.
- Simple LED remote (no display) – you cannot adjust speed from the remote. You need either an app or controller reprogramming.
Concrete verification step after adjustment: Ride a measured mile (or use a known-distance path) while running a GPS app like Strava or Ride with GPS. Compare the display reading to the GPS reading. If they differ by more than 2 mph, the wheel-diameter hack is likely the cause. Revert to the correct wheel size and use the direct speed limit setting if available.
Realistic limitation of display adjustments: The wheel-diameter trick makes your speedometer permanently inaccurate. It can also confuse the motor controller’s torque sensing, causing jerky assist on hills. Worse, pushing the speed limit beyond the controller’s design can blow a MOSFET or overheat the motor on a long climb. If your display shows an error code (e.g., “Error 06” or “motor phase fault”) after raising the speed, revert immediately.
Using a Smartphone App
Many newer ebikes (Specialized Turbo, Bosch Smart System, Bafang M600, and brands like KETELES Ebikes for Adults, AWD Dual Motor Ebike) let you change speed settings through an official app. The process is usually simpler:
- Download the manufacturer’s app (e.g., Specialized Mission Control, Bosch Flow, Bafang Go+, or a generic BLE controller app).
- Pair your smartphone with the bike via Bluetooth.
- Navigate to the “Speed” or “Assist” section.
- Drag the slider to your desired maximum (often 20 mph, 28 mph, or a custom value).
- Save the profile. The change takes effect immediately.
Pros: No need to memorize parameter numbers; the app often shows the legal class clearly and may log changes.
Cons: Only works with bikes that have app compatibility. Some brands encrypt the speed setting to prevent user adjustment—your bike may simply refuse to save a value above the factory limit. If that happens, the only way to raise the speed is a controller reprogramming or a third-party tuning dongle (which may void warranty).
Verification step: After saving, check the app’s “Current Settings” page to confirm the new limit. Then take a short ride and watch the display peak—if it still cuts off at the old speed, the app change may not have been saved to the controller (try restarting the bike).
Controller Reprogramming: When and How
For non-display or older bikes, adjusting speed means reprogramming the motor controller directly via a programming cable (often USB to UART) and software like Bafang Configurator, KT-Tool, or VESC Tool. This is an advanced procedure and not for casual riders:
- Bafang mid-drives (BBS01/BBS02/BBSHD) – The “Speed Limit” parameter (in RPM) can be raised. But going above 50 percent over stock may overheat the controller or melt the nylon gear inside the motor.
- Hub motor controllers with LCD – Often allow a “Max Speed” parameter in the advanced menu. Raising it beyond the controller’s design can blow a MOSFET, leaving you with a dead motor mid-ride.
- Sine-wave vs. square-wave controllers – Sine-wave controllers handle higher RPM more efficiently, but both types risk overheating if you push the speed limit too far while climbing a long hill.
Common failure mode: Increasing the speed limit without upgrading the battery’s discharge capability can cause voltage sag under load, triggering a low-voltage cutout or error code. If the bike shuts off during a hard acceleration, that’s a sign the controller or battery cannot support the new setting.
What to do first: Document every original parameter before making any change. Take photos of each screen or write down the values. That way you can revert if the bike behaves erratically. If you do not have a programming cable, many controllers have a hidden “advanced menu” accessible by pressing a button combination—check enthusiast forums for your specific controller model.
Legal Class Rules and Your Responsibilities
Changing your speed setting can alter your bike’s legal classification. In the US, the three-class system is standard:
| Class | Max Assist Speed | Throttle? | Typical Road Use |
|---|---|---|---|
| 1 | 20 mph | No (pedal-assist only) | Bike lanes, trails (where allowed) |
| 2 | 20 mph | Yes | Bike lanes, many multi-use paths |
| 3 | 28 mph | Yes (assist; throttle often limited to 20 mph) | Roads only; helmet required in many states |
If you raise a Class 1 bike’s speed to 28 mph, it becomes functionally a Class 3, and you may be riding illegally on trails or without a helmet. Lowering a Class 3 to 20 mph makes it legal on Class 2-only paths. Always check your state and local ordinances—some jurisdictions have additional restrictions (e.g., no ebikes on certain trails, or a maximum wattage).
Trade-off to consider: A bike that was sold as Class 2 (throttle + 20 mph) cannot be legally ridden on Class 1-only trails even if you disable the throttle permanently. The class is determined by the bike’s original specifications and labeling, not by a temporary setting change. If you get pulled over, the officer will check the sticker on the frame, not your app settings.
Safety and Warranty Trade-Offs
- Brakes – Stock brakes on many ebikes are designed for the factory speed limit. At higher speeds, you’ll need stronger brakes (hydraulic discs) and larger rotors. Expect to spend $100–$300 on an upgrade if you raise the limit beyond 20 mph.
- Tires – Most city tires are rated for 30 mph max. Check the sidewall for a speed rating (e.g., “30 mph” or “50 km/h”). If you ride at 28+ mph on tires rated for 25 mph, you risk a blowout. Consider upgrading to tires with a higher rating (e.g., Schwalbe Marathon E-Plus).
- Helmet – If you plan to ride at speeds above 20 mph, wear a certified ebike helmet such as the JARSH Commute Smart EBike Helmet with Lights (NTA-8776 certified for speeds up to 28 mph). This standard offers better impact protection for higher-speed crashes.
- Warranty – Any user-visible speed adjustment (especially via app) is usually logged by the manufacturer. If you later have a motor failure, they may deny coverage if the speed limit was increased. Some brands (like Bosch) also lock the controller so that a dealer must reset it—any unauthorized change voids the warranty permanently.
Bottom line: For most riders, staying within the bike’s original class is the safest and most practical choice. If you need more speed, consider a bike that comes from the factory with the higher limit. If you need more range, lowering the speed limit costs nothing and carries no safety risk. Adjust only after understanding what you are changing, and always test in a safe, empty area before taking your bike onto shared roads or trails.