The increasing popularity of e assist technology has transformed the way we experience cycling, offering enhanced performance and accessibility for riders of all levels. This article aims to guide you through the process of adding e assist to your bicycle, enabling you to enjoy a more efficient and enjoyable ride. By carefully selecting the right e assist kit and preparing your bicycle for installation, you can seamlessly integrate this innovative feature into your existing setup. We will cover essential tools, installation steps, and maintenance tips to ensure your e assist system operates optimally. Whether you are a seasoned cyclist or a newcomer to the sport, this comprehensive guide will equip you with the knowledge to enhance your biking experience.
Key Takeaways
Selecting an e-assist kit requires consideration of compatibility, power output, battery life, and installation ease.
Popular options include Bafang for customization, Tongsheng for affordability, and Shimano Steps for seamless integration.
Essential tools include wrenches, a torque wrench, cable cutter, and a multi-tool designed for bicycles.
Regular testing and maintenance, along with proper control panel setup, are vital for ensuring optimal performance and longevity of the e-assist system.
Choosing the Right E Assist Kit
Selecting the appropriate E Assist kit for your bicycle is crucial for enhancing your riding experience. Various factors such as compatibility, power output, and battery life must be taken into account to ensure optimal performance. By focusing on key features and exploring popular E Assist kits, you can make an informed decision that best suits your cycling needs.
Key Features to Consider
Key features to consider when evaluating E Assist kits include motor efficiency, weight distribution, ease of installation, and available support options. Motor efficiency directly impacts the battery life and overall performance of the system. Weight distribution is crucial for maintaining balance and stability during rides, especially with added components. Ease of installation can significantly influence user experience, reducing the time and tools required for setup. Lastly, robust support options are essential for troubleshooting and maintenance, ensuring long-term satisfaction with the E Assist kit.
Popular E Assist Kits
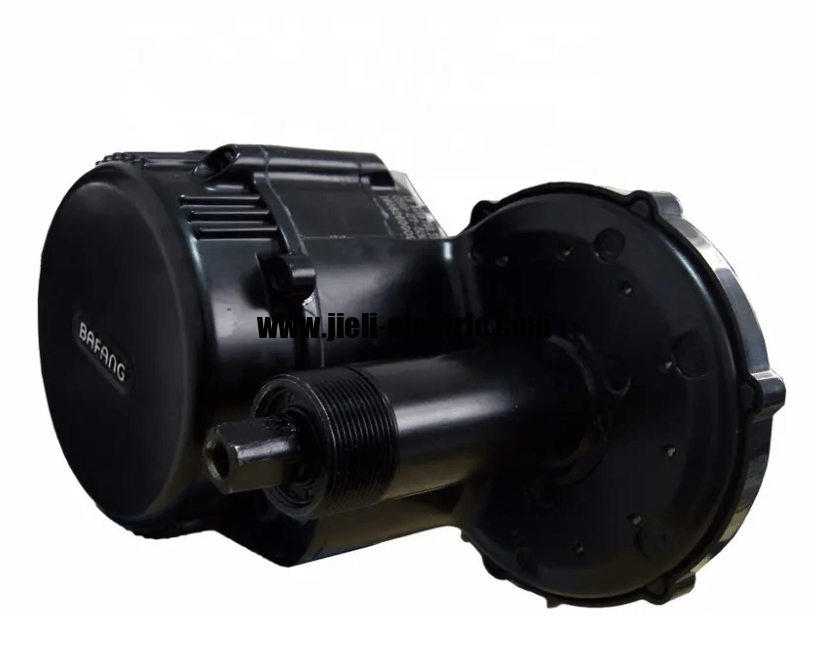
Popular E Assist kits vary significantly in features and specifications, catering to a diverse range of cycling preferences and requirements. Some of the most well-regarded kits include Bafang, Tongsheng, and Shimano Steps, each offering unique advantages. Bafang kits are known for their powerful motors and extensive customization options, making them popular among enthusiasts. Conversely, Tongsheng provides a more budget-friendly solution without sacrificing performance, appealing to casual riders. Lastly, Shimano Steps is often favored for its seamless integration with existing bicycle components, ensuring a smooth and reliable ride.
Essential Tools and Materials
To successfully integrate an E Assist system into your bicycle, it is crucial to gather the appropriate tools and materials. These essential components will not only facilitate a smoother installation process but also ensure optimal performance of the system. Below, we outline the basic tool requirements and provide a necessary materials checklist to guide you through this endeavor.
Basic Tool Requirements
A comprehensive understanding of basic tool requirements is essential for the successful installation of an E Assist system on a bicycle. Key tools include a set of metric and standard wrenches, screwdrivers, and pliers to ensure proper assembly and adjustments. Additionally, a torque wrench is necessary to achieve the correct tightness on various components, preventing potential damage. A cable cutter and wire strippers are also crucial for handling electrical connections effectively. Finally, a multi-tool specifically designed for bicycles can greatly enhance efficiency during the installation process.
Necessary Materials Checklist
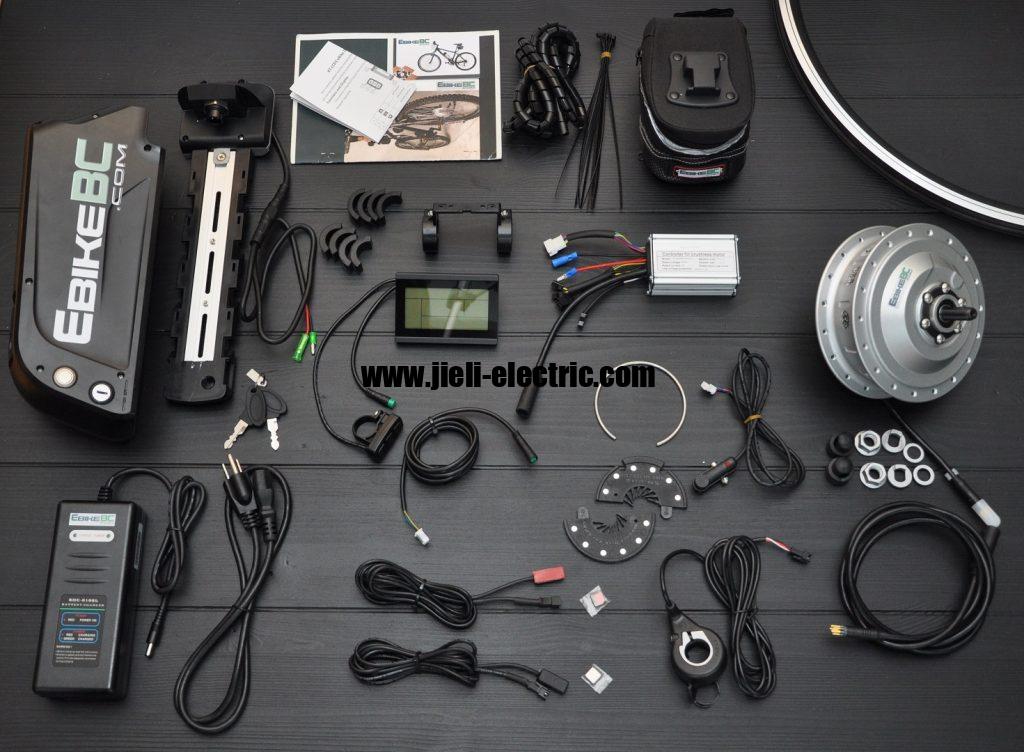
The necessary materials checklist serves as a fundamental resource for ensuring that all components required for the E Assist system installation are accounted for. This checklist typically includes items such as the E Assist motor, battery pack, controller, wiring harness, and mounting brackets. Additionally, it may specify the need for tools like screwdrivers, wrenches, and cable ties to secure the setup. Verifying the presence of these materials before commencing the installation can prevent delays and complications. Ultimately, a comprehensive checklist enhances the likelihood of a successful and efficient E Assist integration.
Preparing Your Bicycle for Installation
Ensuring that your bicycle is in optimal condition is essential before proceeding with the installation of e-assist components. Conduct a thorough inspection of the frame, wheels, and tires for any signs of damage or wear. Verify that the brakes are functioning properly and that the cables are in good condition. Additionally, check the drivetrain for any issues, ensuring that the chain, gears, and derailleur are operating smoothly. Finally, ensure that the electrical system, if applicable, is compatible with the new e-assist components you plan to install.
Installing the Motor and Battery
The process of installing the motor and battery is crucial for the successful integration of e-assist technology into your bicycle. Attention to detail in the installation phase ensures optimal performance and safety. The following points will guide you through key considerations for this critical step.
Choosing the Right Location
Selecting an appropriate location for the motor and battery installation significantly influences the overall performance and balance of the bicycle. The center of gravity should be considered to maintain stability during rides. Additionally, accessibility for maintenance and battery replacement is essential for long-term use. Environmental factors, such as exposure to moisture and debris, should also be taken into account to protect the components. Ultimately, a well-chosen location enhances both functionality and rider experience.
Wiring the Motor Properly
Proper wiring of the motor is essential to facilitate efficient power transfer and maintain the overall functionality of the e-assist system. It is imperative to ensure that all connections are secure and insulated to prevent electrical shorts. Using the appropriate gauge wire will minimize resistance and enhance performance. Additionally, routing the wires away from moving parts will reduce the risk of damage during operation. Regularly inspecting the wiring after installation can help identify any potential issues early on.
Securing the Battery Pack
Securing the battery pack effectively is essential for maintaining stability and preventing damage during operation. Proper mounting ensures that the battery remains in place, minimizing movement that could lead to wear or disconnection. Use appropriate brackets or straps designed for the specific battery type to achieve a secure fit. Additionally, consider the placement of the battery to maintain an even weight distribution throughout the bicycle. Regularly inspect the battery pack and its mounting system to ensure continued safety and performance.
Connecting the Wiring and Controls
With the motor and battery securely installed, the next critical step involves connecting the wiring and controls to ensure optimal functionality. This phase encompasses various aspects such as establishing wiring connections and configuring the control panel. Attention to detail during this process is vital, as it lays the groundwork for seamless operation and effective troubleshooting of any potential wiring issues.
Wiring Connections Explained
Wiring connections form the backbone of any electrical system, serving as the pathways through which power and signals are transmitted to various components. Properly executed connections are essential to maintaining the integrity of the system, preventing issues such as voltage drops and signal loss. The use of high-quality connectors and appropriate gauge wiring significantly enhances reliability and performance. Additionally, meticulous labeling of wires aids in troubleshooting and future modifications, ensuring a streamlined maintenance process. Ultimately, a thorough understanding of wiring connections is crucial for achieving a fully functional and efficient e-assist bicycle.
Control Panel Setup
The arrangement and configuration of the control panel play a crucial role in ensuring user-friendly operation and efficient monitoring of the system’s performance. Properly labeling each control and indicator is essential for clarity and ease of use. Additionally, the placement of buttons and displays should allow for quick access and visibility while riding. Calibration of the control settings is necessary to match the rider’s preferences and ensure optimal performance. Following manufacturer guidelines during the setup process will enhance the overall reliability and functionality of the e-assist system.
Troubleshooting Wiring Issues
Identifying and addressing wiring issues promptly is essential for maintaining the reliability and efficiency of the system. Common symptoms of wiring problems include inconsistent power delivery, malfunctioning controls, and unusual noises from the motor. Conducting a thorough visual inspection of all connections can help identify loose or damaged wires that may compromise functionality. Utilizing a multimeter can facilitate the detection of short circuits or breaks in the wiring. Implementing preventive measures, such as securing and insulating connections, can reduce the likelihood of future wiring complications.
Testing Your E Assist System
Testing your e assist system is essential to ensure optimal performance and safety during use. Begin by checking the battery charge and ensuring all connections are secure. Next, perform a functional test of the motor, verifying that it engages smoothly and responds appropriately to throttle inputs. Additionally, assess the braking system to confirm that it operates effectively in conjunction with the e assist features. Finally, take the bicycle for a short ride to evaluate the overall integration and performance of the e assist system in real-world conditions.
Maintenance and Troubleshooting Tips
Regular maintenance and troubleshooting are essential to ensure optimal performance and longevity of the e-assist system on your bicycle. Periodically inspect the battery for any signs of wear or damage, as well as ensuring it is securely mounted. Check the wiring and connections for any fraying or loose connections that could affect performance. Clean the motor and sensors to prevent debris accumulation that may hinder functionality. Lastly, consult the manufacturer’s guidelines for any recommended service intervals or specific troubleshooting steps to address potential issues.
Frequently Asked Questions
What are the benefits of adding e assist to my bicycle?
The integration of e-assist technology into a bicycle offers numerous advantages that enhance both the riding experience and overall efficiency. One of the primary benefits is the ability to tackle challenging terrains and inclines with greater ease, allowing riders of varying fitness levels to enjoy cycling without the intimidation of steep hills. Furthermore, e-assist systems can significantly reduce the physical strain on the rider, making longer rides more accessible and enjoyable. Another key advantage is the potential for increased commuting efficiency; e-assist enables users to cover greater distances in a shorter amount of time, which can be particularly beneficial in urban settings. Additionally, the use of e-assist can promote a more sustainable mode of transportation, contributing to a reduction in carbon emissions associated with traditional vehicular travel. Overall, the incorporation of e-assist technology not only enhances the functionality of a bicycle but also encourages a healthier, more environmentally conscious lifestyle.
Can i use an e assist kit on any type of bicycle?
The compatibility of an e-assist kit with various types of bicycles largely depends on the specific design and components of both the bicycle and the kit itself. Generally, many e-assist kits can be installed on traditional bicycles, including road bikes, mountain bikes, and hybrids, provided that the frame and structural integrity can accommodate the necessary modifications. However, certain bicycles, such as those with unique geometries or materials, may present challenges that could complicate the installation process. Additionally, factors such as wheel size and braking systems must be considered, as they can influence the performance of the e-assist system. It is advisable to consult with the manufacturer of the e-assist kit to ensure compatibility with your particular bicycle model. Ultimately, while many bicycles can be adapted for e-assist functionality, thorough research and professional guidance are recommended to achieve optimal results.
How do i choose the right battery size for my e assist system?
Choosing the right battery size for an e-assist system is a critical decision that significantly impacts the overall performance and range of the bicycle. First, one must consider the intended usage of the bicycle, including factors such as terrain, distance, and frequency of use. Higher-capacity batteries provide extended range and can support more demanding riding conditions, while smaller batteries may suffice for casual riders on flat terrain. It is also essential to evaluate the weight and balance of the bicycle, as larger batteries can add considerable weight, potentially affecting handling and maneuverability. Additionally, compatibility with the e-assist motor and the electrical system of the bicycle should be assessed to ensure optimal performance. Finally, budgetary constraints can influence battery size selection, as larger batteries typically come at a higher cost.
For those looking to enhance their cycling experience with E Assist technology, it’s also essential to ensure your bike is properly equipped. A key aspect of bike performance is tire pressure, especially for fat E-bikes. I highly recommend checking out this informative guide on choosing the right tire pressure for your fat E-bike to optimize your ride.